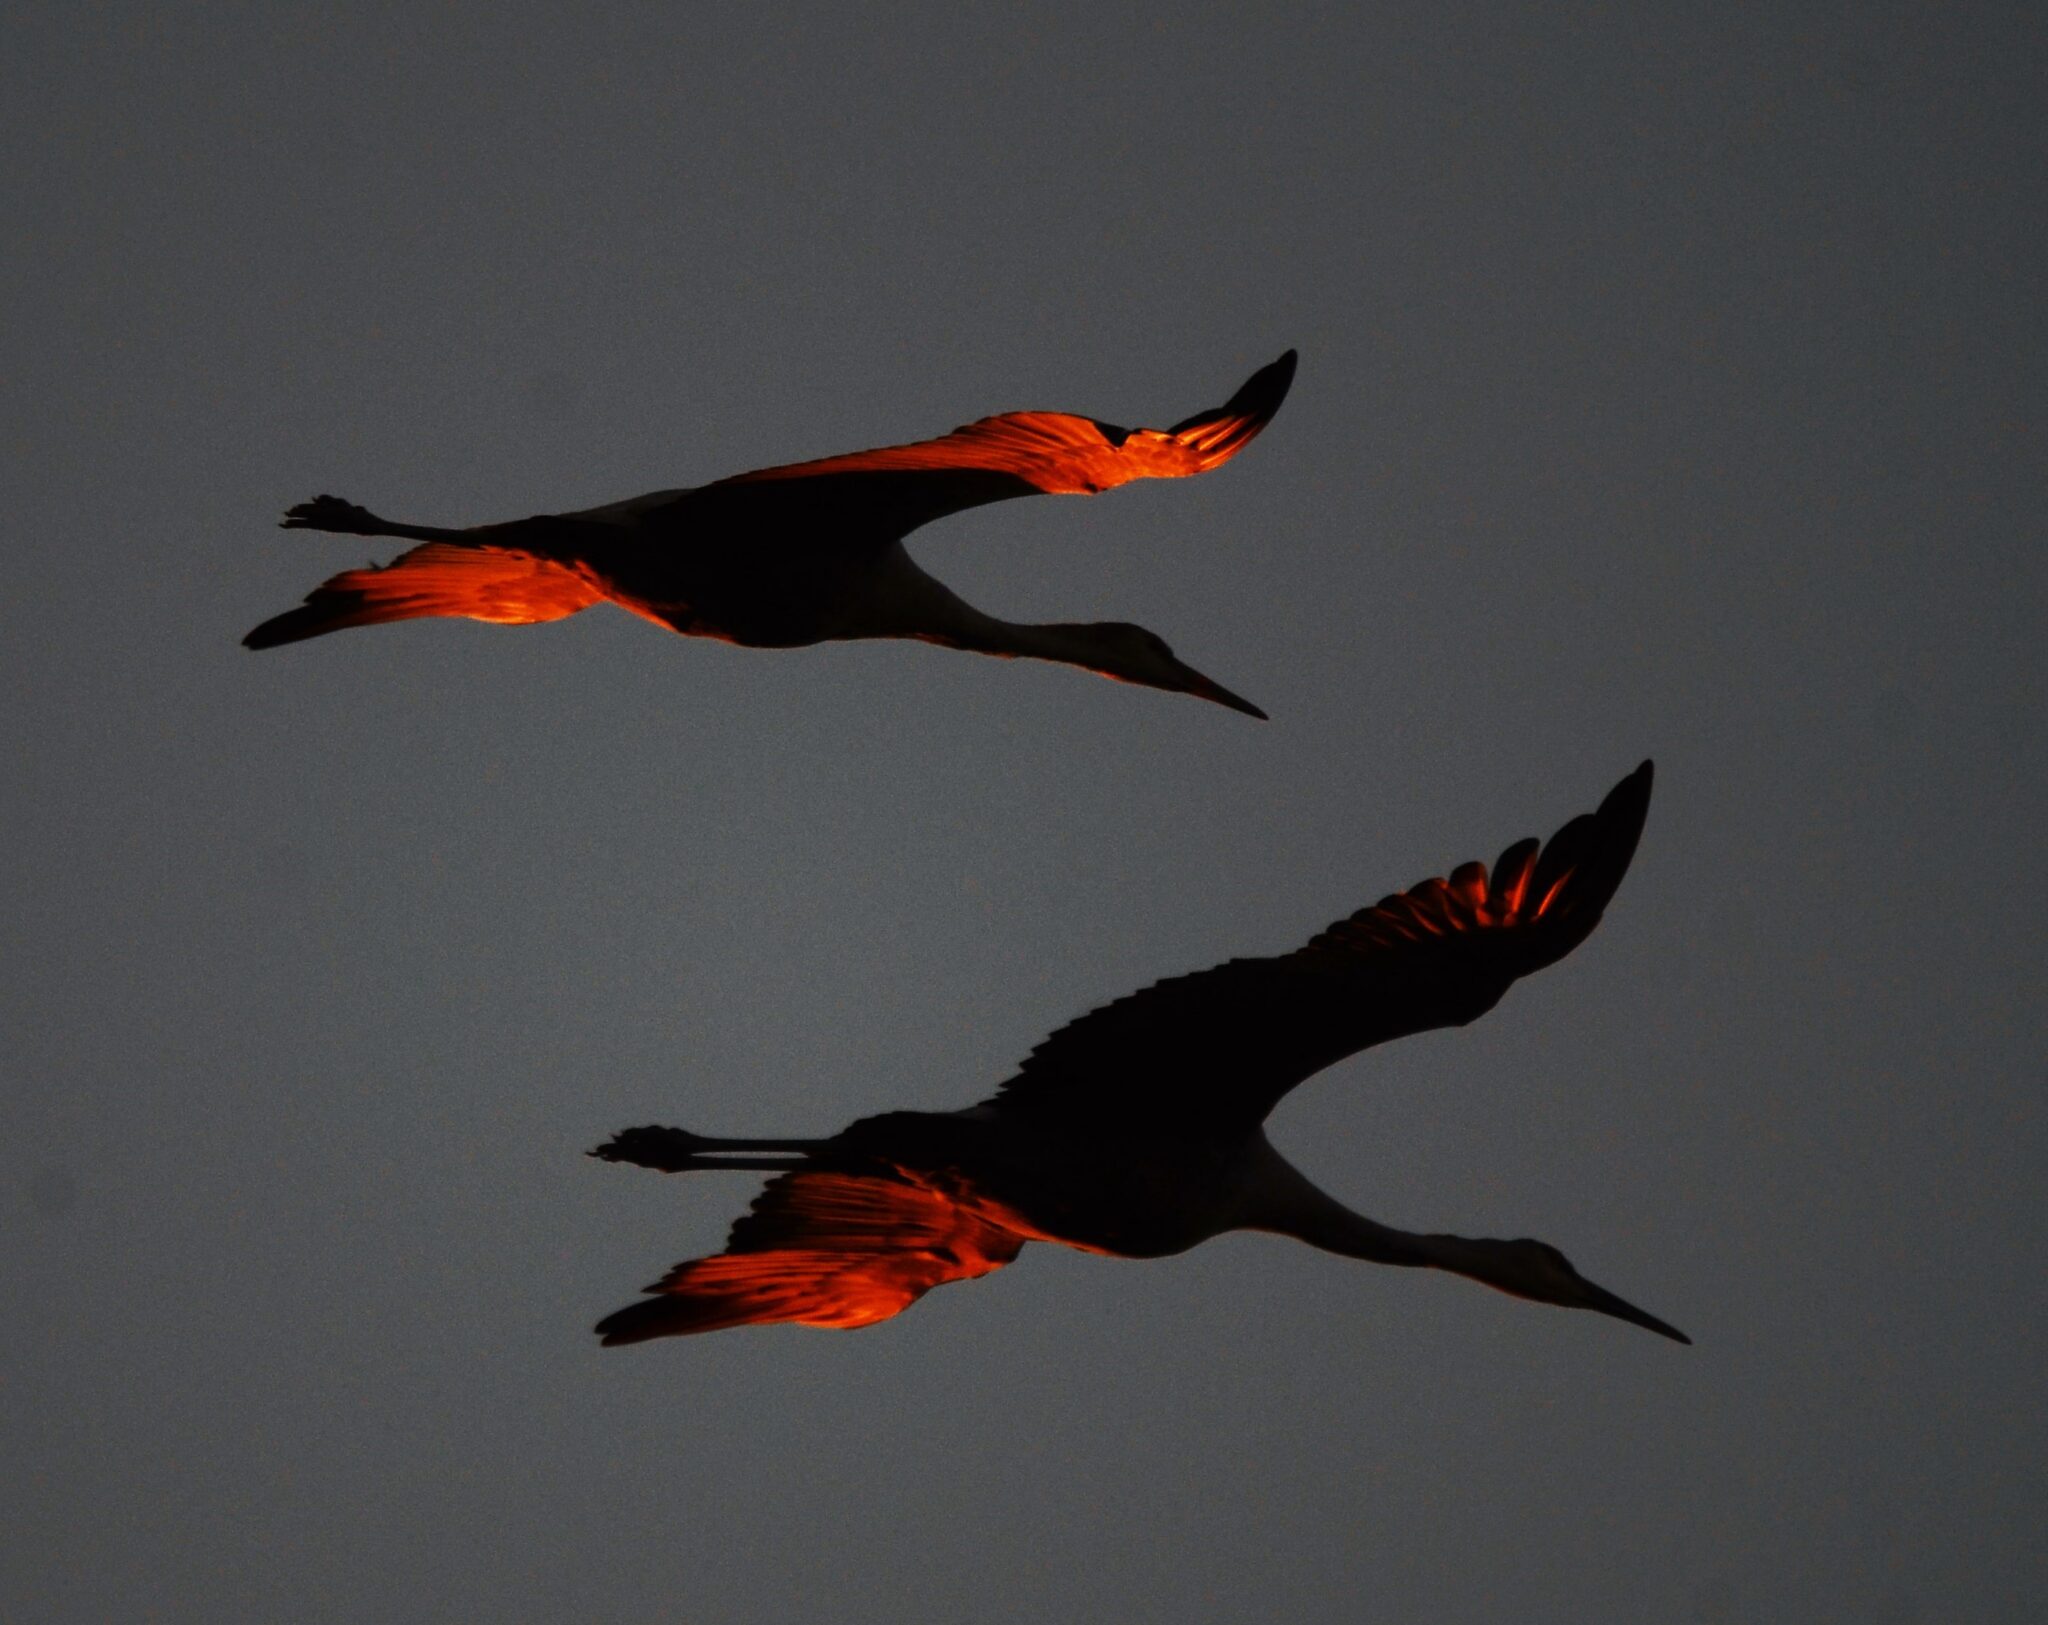
For reference, please see Tip #22 to view an image photographed less than five minutes prior to this one. As direct light from the sun slowly comes across the horizon, you have but a few minutes to get an image where the bottom of a bird’s wings are lit. This phenomenon is very short lived and I was lucky enough to have Sandhill Cranes flying near me For this image I was positioned in a ditch next to a slough in Crex Meadows State Wildlife Area near Grantsburg, Wisconsin. Since I took this image a few years ago, I have tried to recreate it to no avail. In order to duplicate this shot, I need to find birds flying precisely at the right time and the right height. This might be that one-in-a-million shots.
 marlenkemmet
Tip #22. Shooting before the morning golden hour
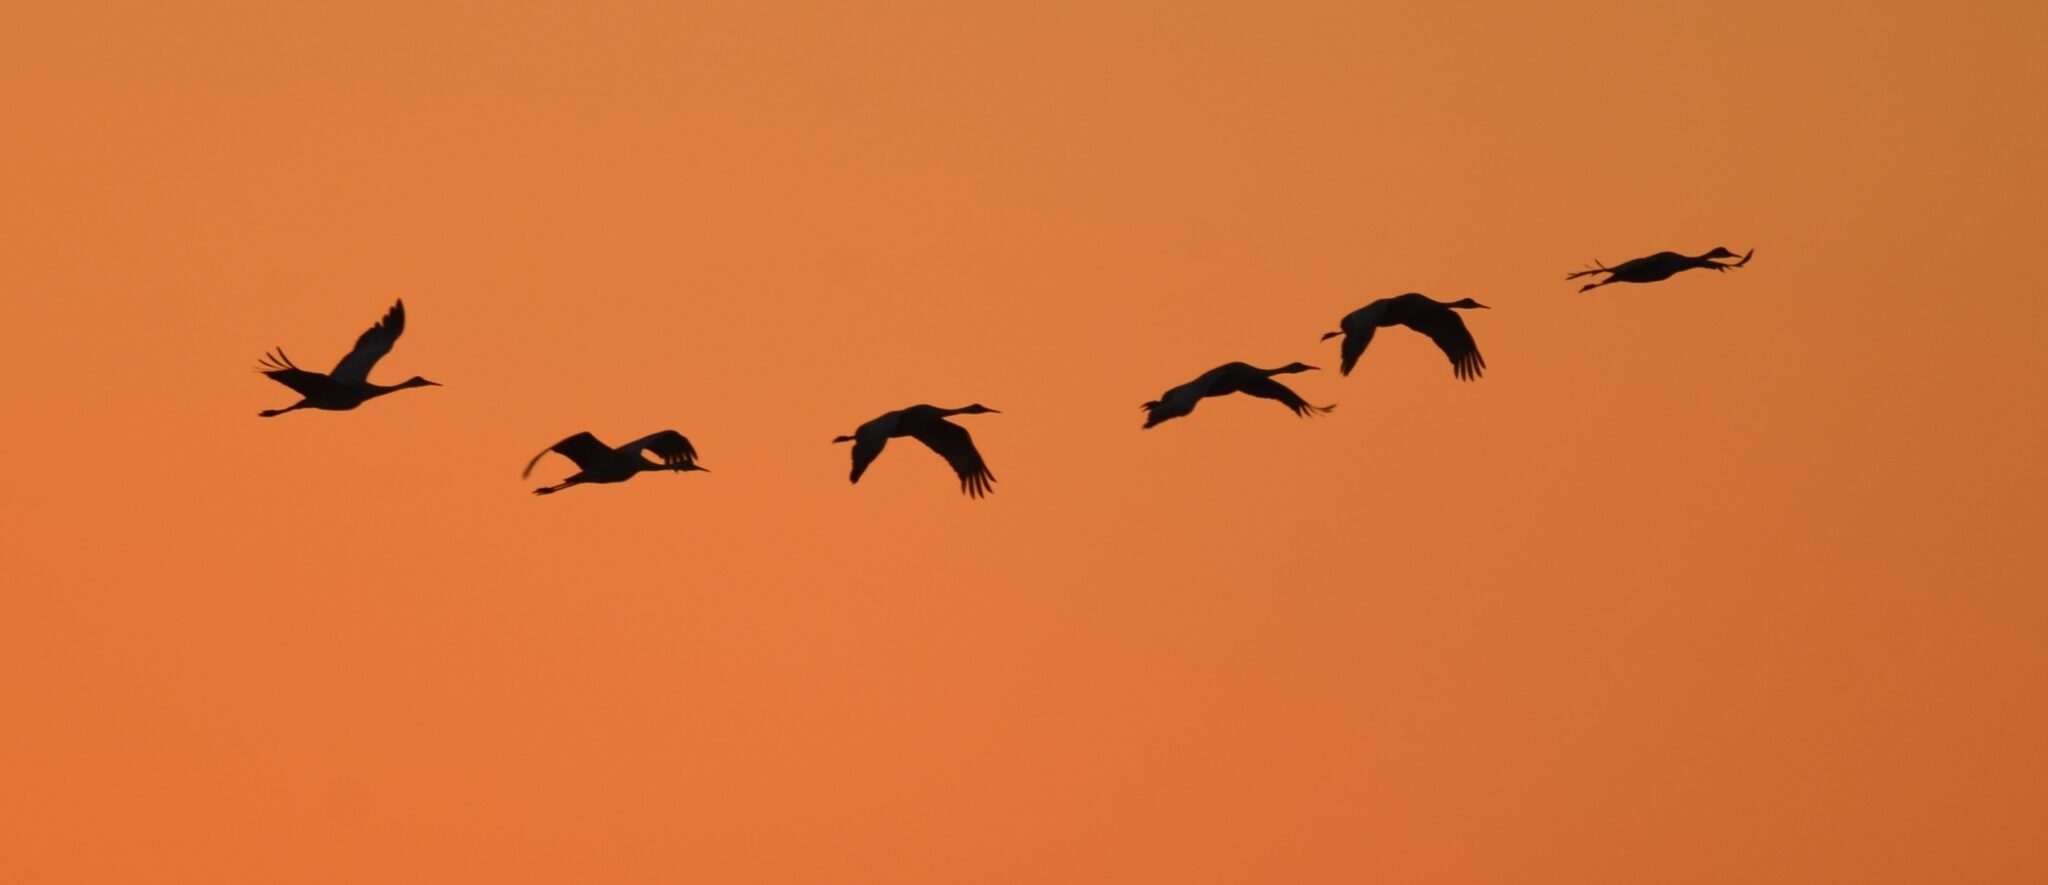
To maximize the great light of the golden hour, normally the hour after sunrise and the hour before sunset, you have to be in position ahead of the time to get everything set up. Often times I will be at the desired location at least a half hour before the golden hour. For this image, I was positioned in a ditch next to a slough in Crex Meadows State Wildlife Area near Grantsburg, Wisconsin. I was at a bit of a disadvantage as the Sandhill Cranes were to the east of me, forcing me to shoot somewhat into the rising sun. Before the sun rose over the horizon, I noticed the eastern sky turn this incredible golden orange. Luckily some of the cranes were leaving the slough they spent the night on to fly over the road to an area to feed at. Being in position early and the the predawn sky allowed me to get several silhouette images. Five minutes later the sky lost this color and turned to dull gray.
Tip #21. Animal portrait shots
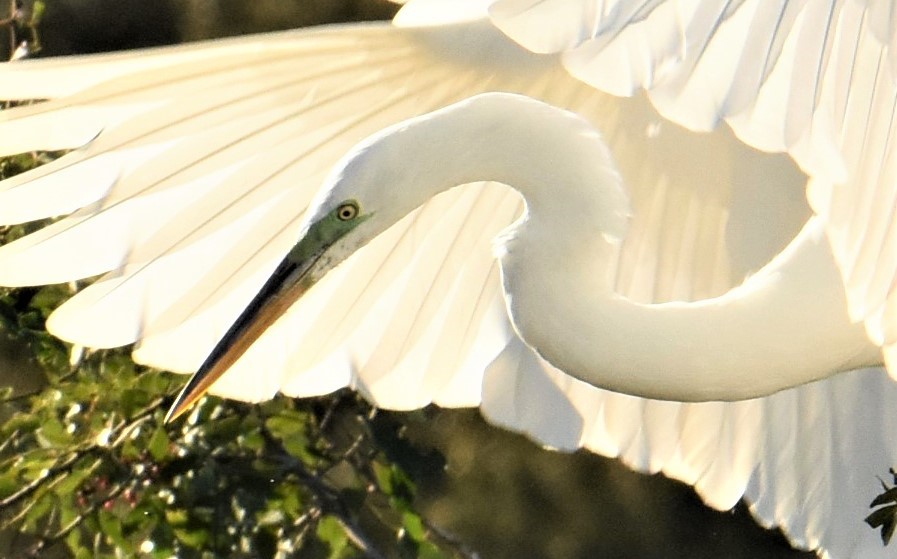
As wildlife photographers we normally want to photograph the entire animal or bird with lots of room around the edges of the image to create “breathing room”. A photo where the legs, wings, or other body parts are too close to the edge or cropped off is often less than pleasing. But sometimes you can get an incredible image by zooming in on just a part of the subject like I did with this great egret. Such a photo has the potential from just being a wildlife image to an artistic portrait. To get this shot, I watched this bird fly to and from a particular tree at the Audubon Center in Venice, Florida. After watching him land in the same spot time and time again, I positioned myself to get the back-lit wing feathers. I cluster shot (multiple frames per second) the landing to get the wings in a forward position creating the background/sweep for the bird’s head. I took over a hundred images with this objective in mind to get the photo I had envisioned. At least half the bird does not appear in the image, but it provides a totally different perspective than a full body shot.
Tip #20. Monitor migrations
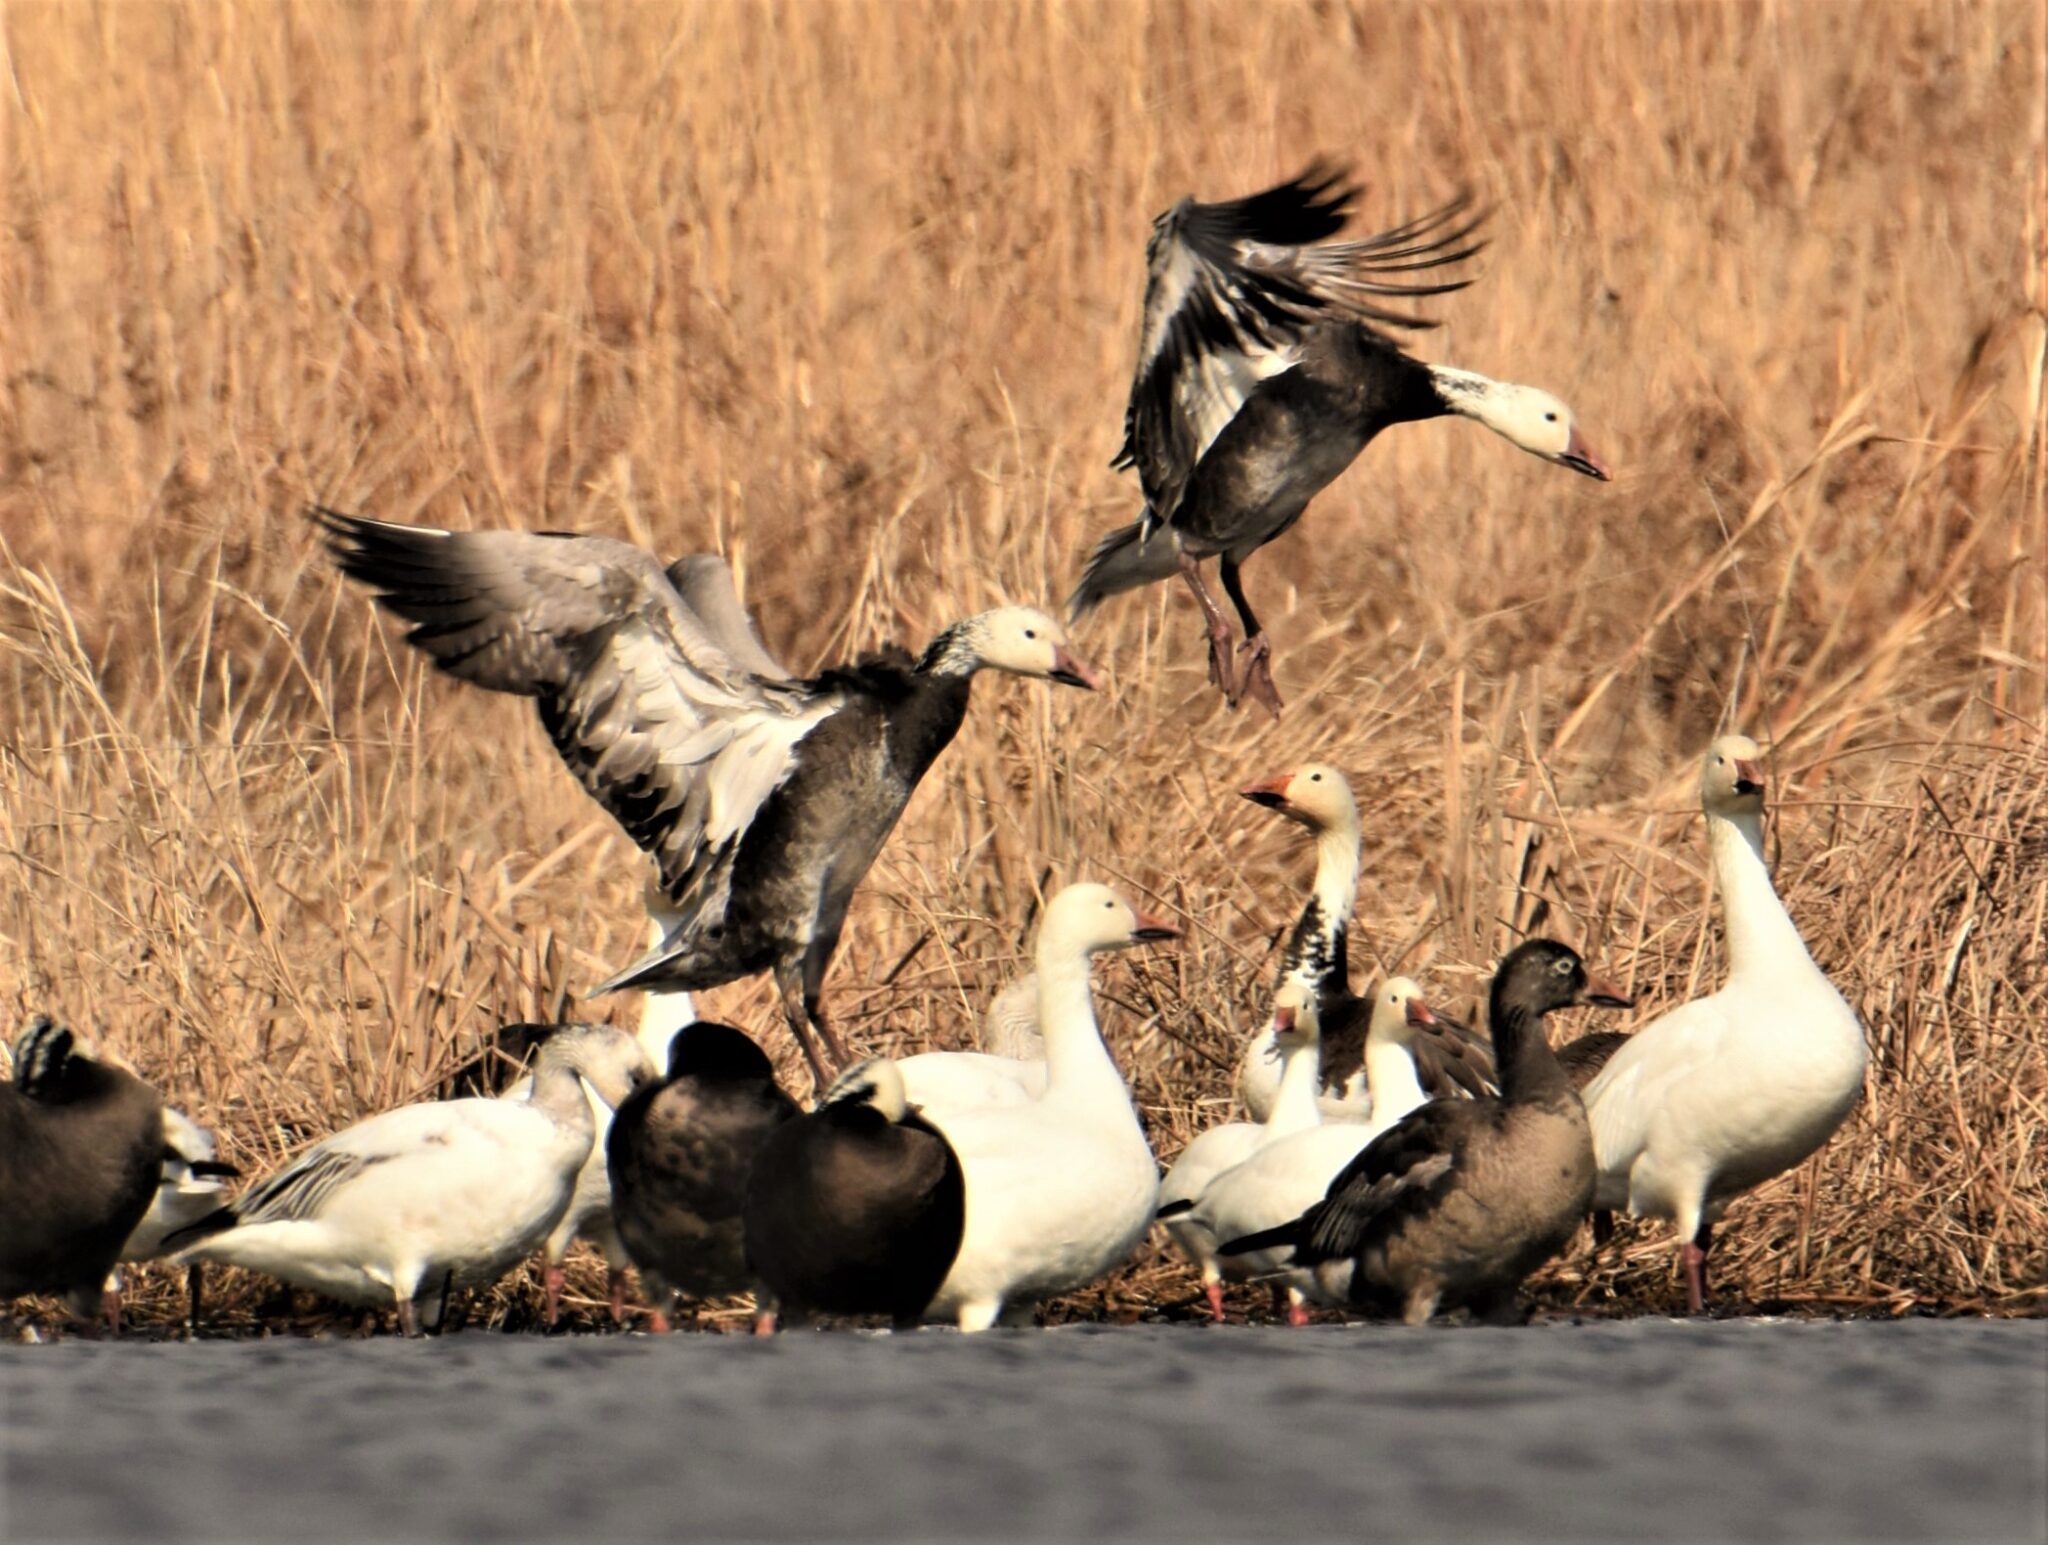
No matter where you live waterfowl should be passing through in the spring and fall. In the spring birds are heading north to their summer nesting grounds. In the fall they are headed south to avoid the harsh winters of the Northland. Here in the Midwest it is important to know both migration times and routes. This photograph was taken in early spring about 20 miles from where I live. I monitor this slough on a near daily basis as my window of opportunity to photograph is usually less than two weeks as the ducks and geese stop through on their migration north. Although we get few Sandhill Cranes in Iowa, you can get great images of thousands of them in Central Nebraska in early spring and then again in late fall. They tend to spend more time in the early spring passing through than the fall. Many preserves parks update their websites daily when the migration is occurring. I often use these to plan our vacations and travels. For instance, last fall Sham and I made reservations months in advance to be at Bosque Del Apache in Central New Mexico in early November for the height of the return of the Sandhill Cranes and Ross Geese. Keep in mind migrations times may vary slightly with the weather. I’ve seen Snow Geese spend a few weeks here in the spring if the Northland is colder than normal, and I’ve seen them fly straight through if the conditions are right up north.
Tip #19. Consider your background
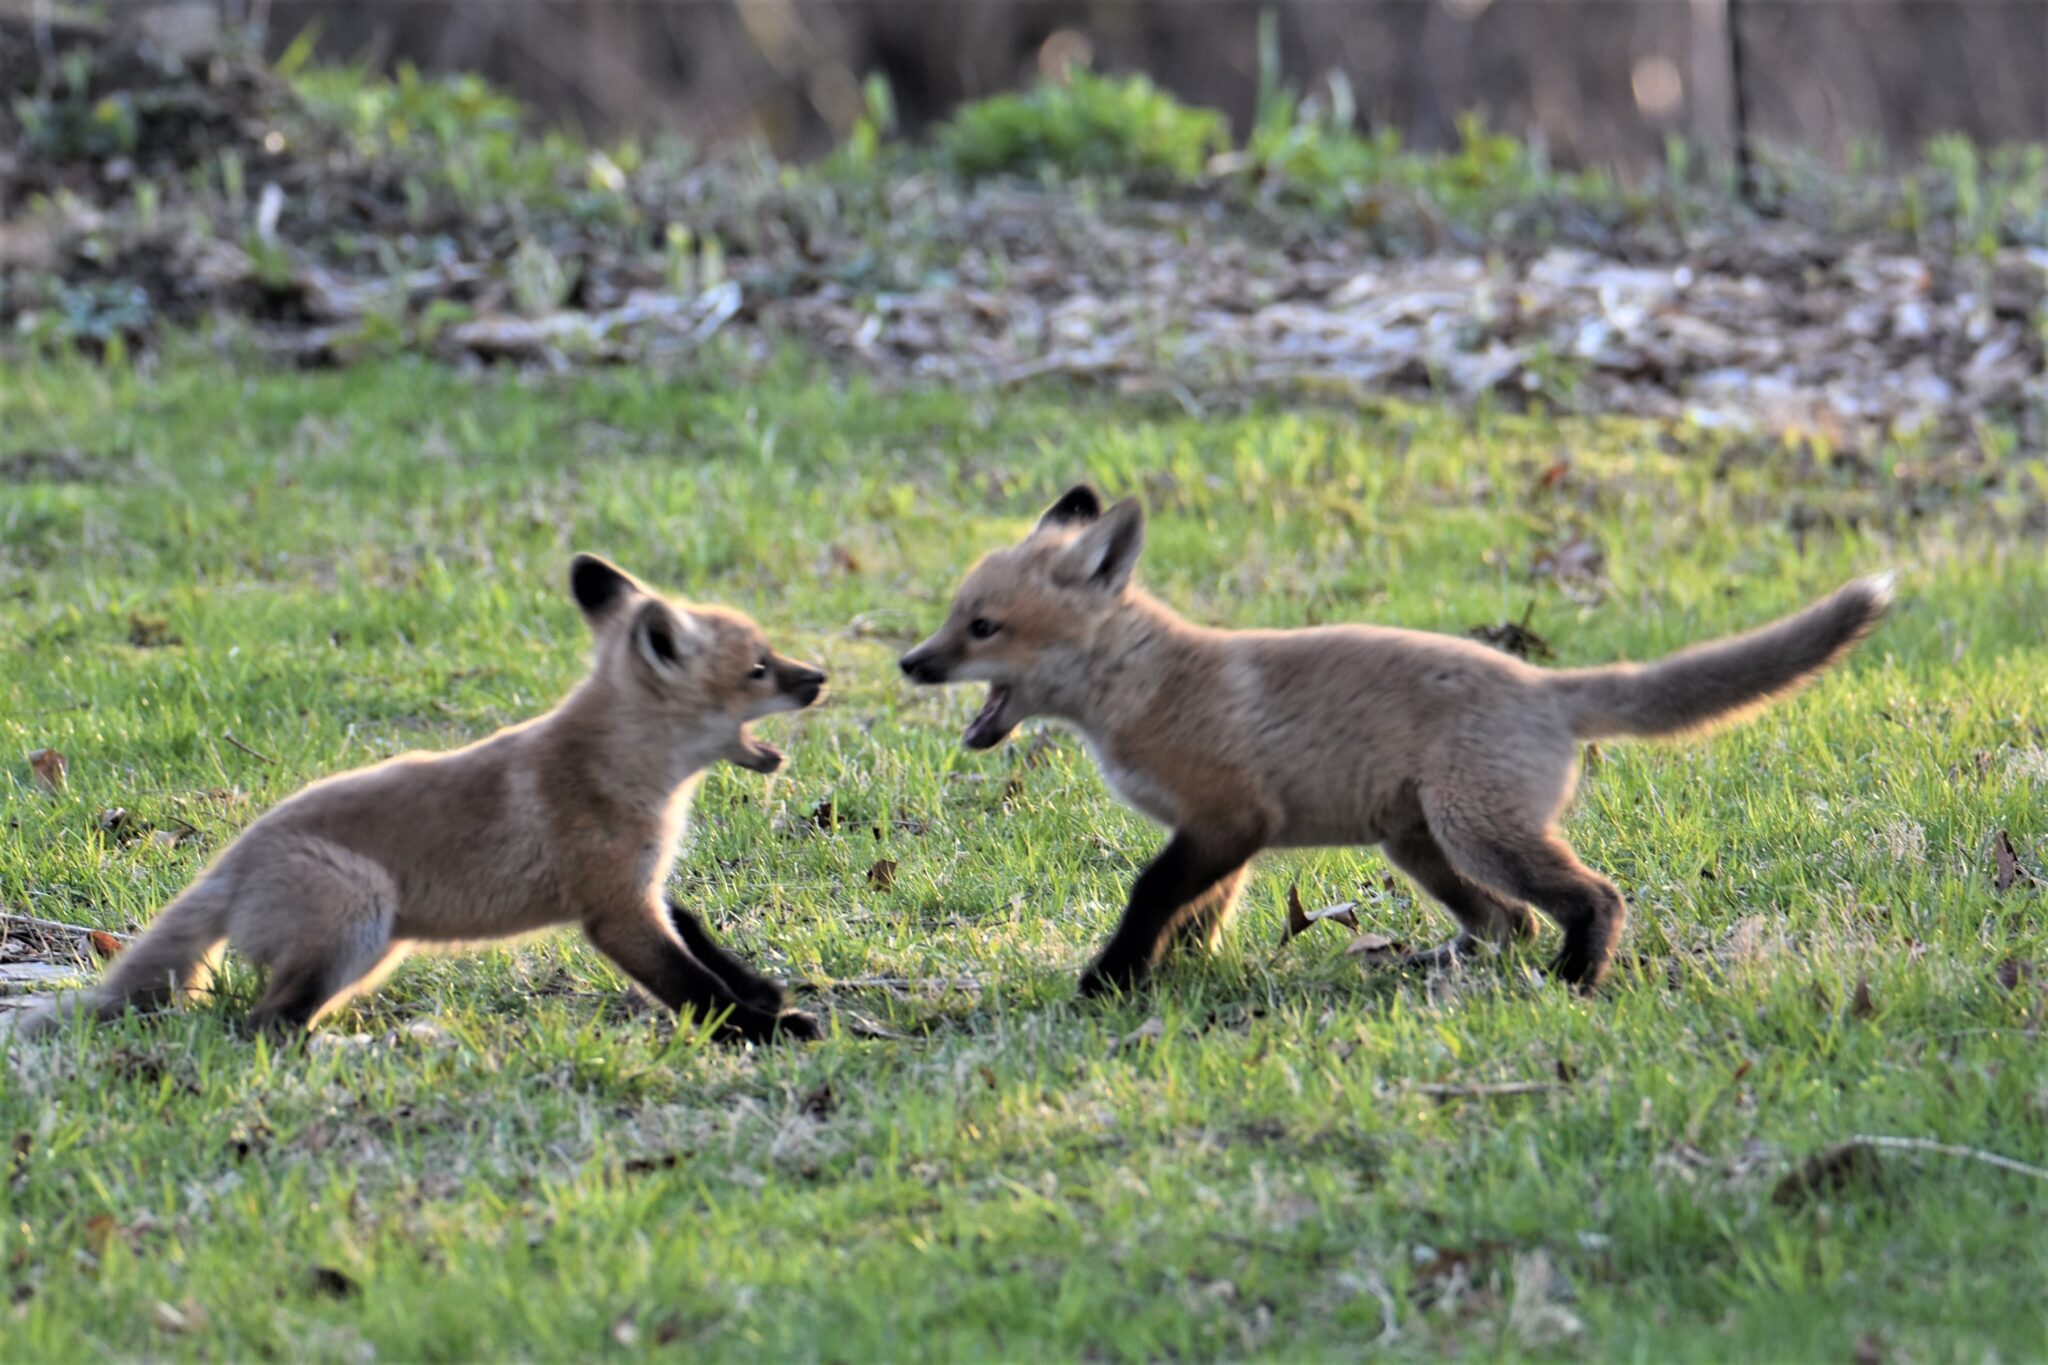
This image was actually shot in a residential setting. But by correctly positioning myself I was able to get a natural looking background. There were many angles to photograph these fox kits, but most of the other locations would have had a fence or building in the background. I know from experience it is easy to get shutter fever and take a bunch of images only to realize later when you look at them enlarged on a monitor that there is a utility line, fence post, farm building, or other distraction in the background. When locating yourself or your blind, take a close look through the lens at the background to make sure there is nothing to take away from the image. If so, you can often move a few feet one way or the other to eliminate the clutter. Fox kits or pups suckle for the first four to seven weeks. The kits emerge from the den at about four weeks and hunt earthworms and insects, but these form only a very small proportion of their diet. The adult fox bring mice, moles, rabbits and other small prey for the kits.
Tip #18. The love of the craft
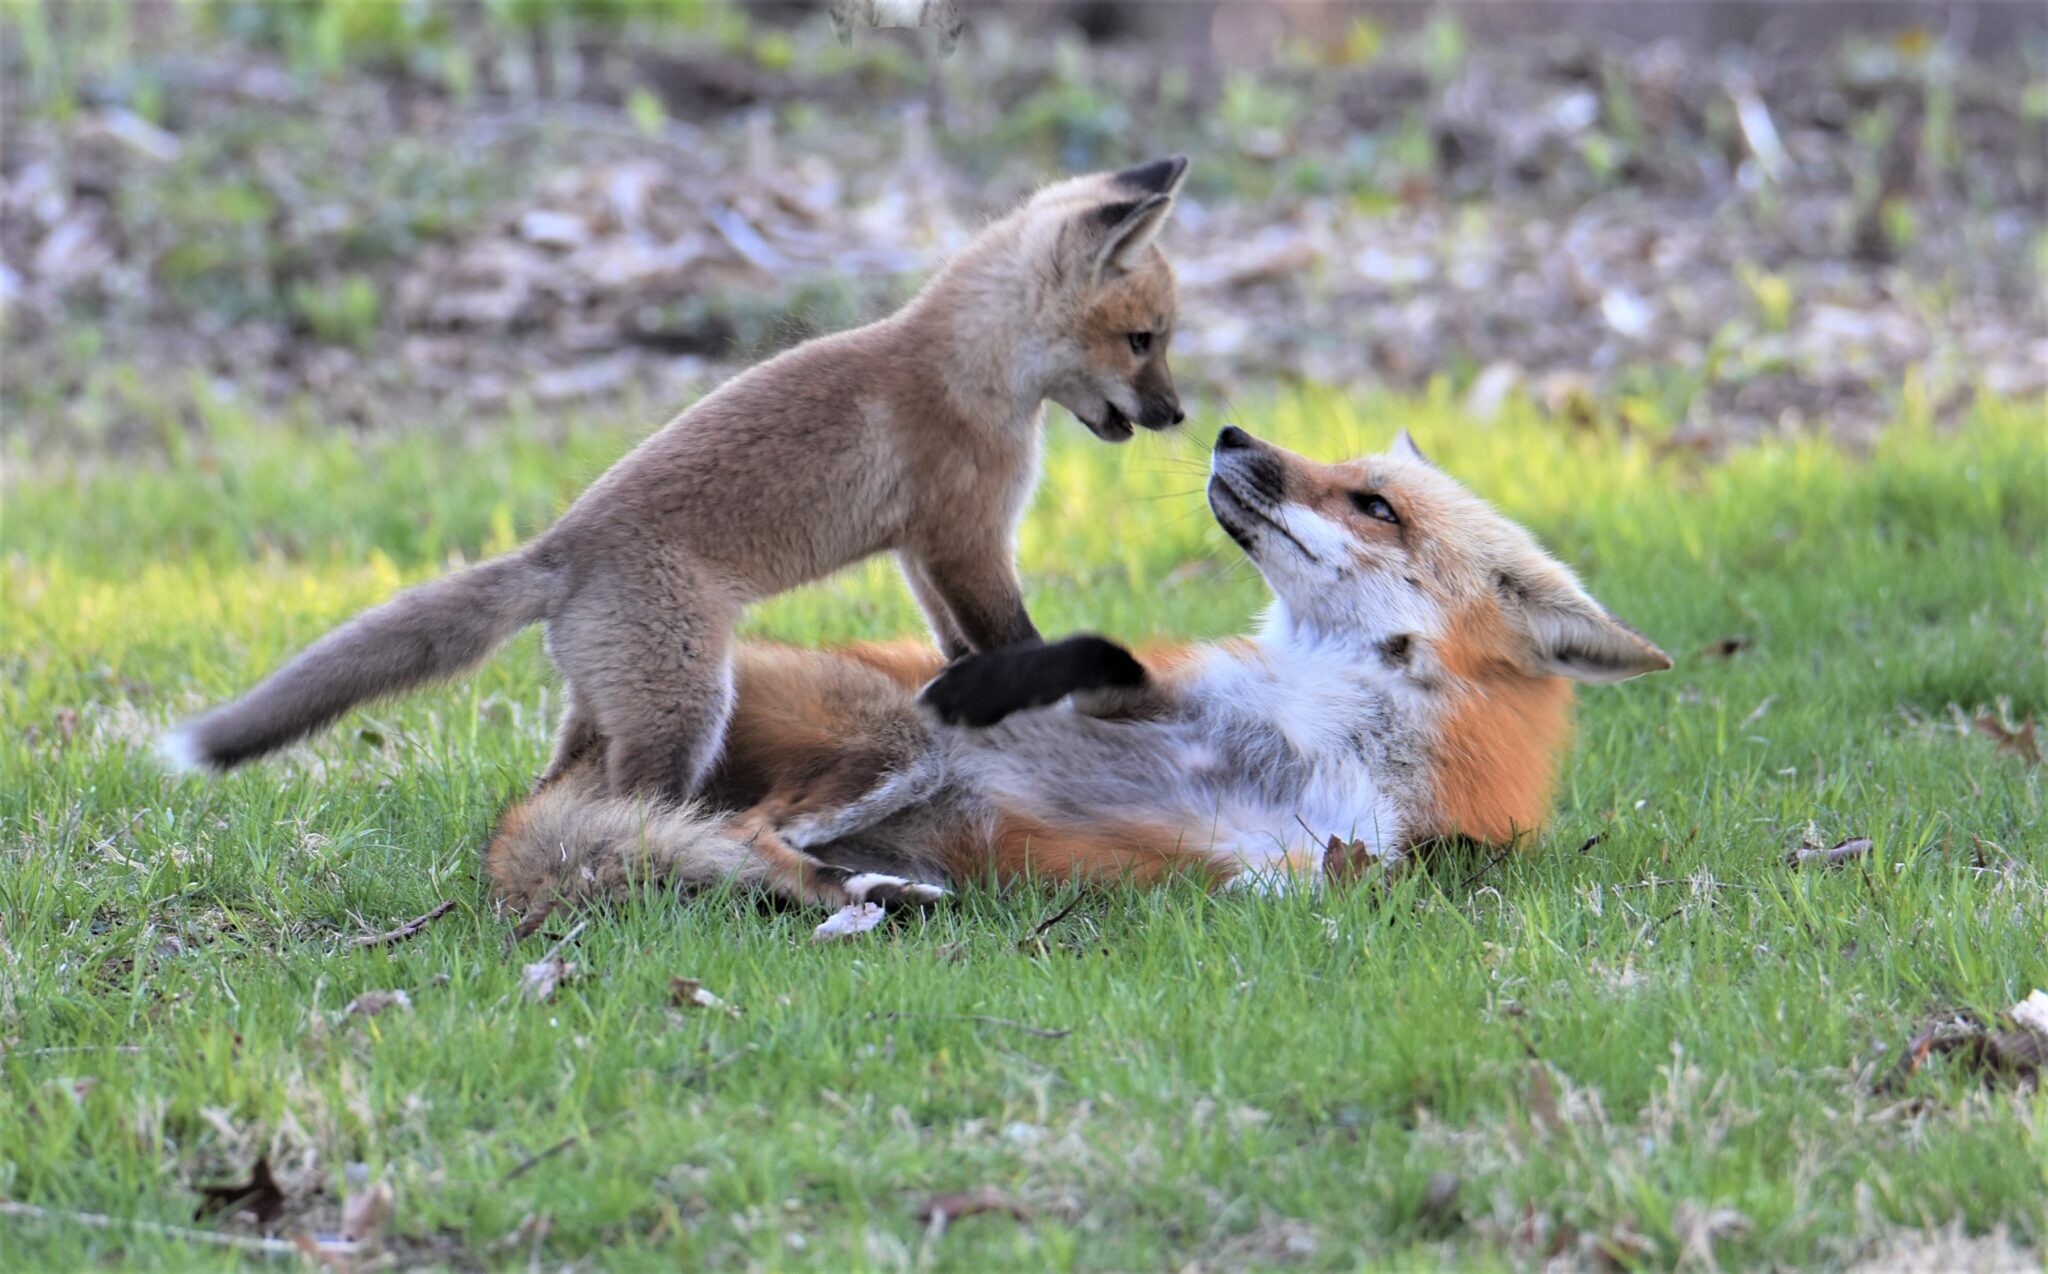
This very well may be one of my most important tips. The only reason it‘s a number 18 is that I just took this image a few hours ago. Some people find solace on a church pew, others playing a musical instrument, and others reading a great book or on a golf course. My nirvana is watching wildlife and given the opportunity, to take a good picture and share it with others. I seldom wear a watch when photographing as I don’t want to know what time it is, how long I’ve been there, or when I may have to quit. I usually run out of light well before I run out of interest in the topic. A few hours ago I had the great opportunity to photograph a male fox and his two of his three kits. I waited for two hours before snapping the first shot, and then I took 800 images in the next 45 minutes. Had it not been for a cloud bank in the west, which cost me the sun about a half hour of light before sunset, I would have shot even longer. Had I not lost light, I would probably still be there now. There is no money in wildlife photography, but there is the opportunity to take something I love and share the love of the craft with others through my images. I hope you enjoy my tips and photography.
Tip #17. Targeted photography
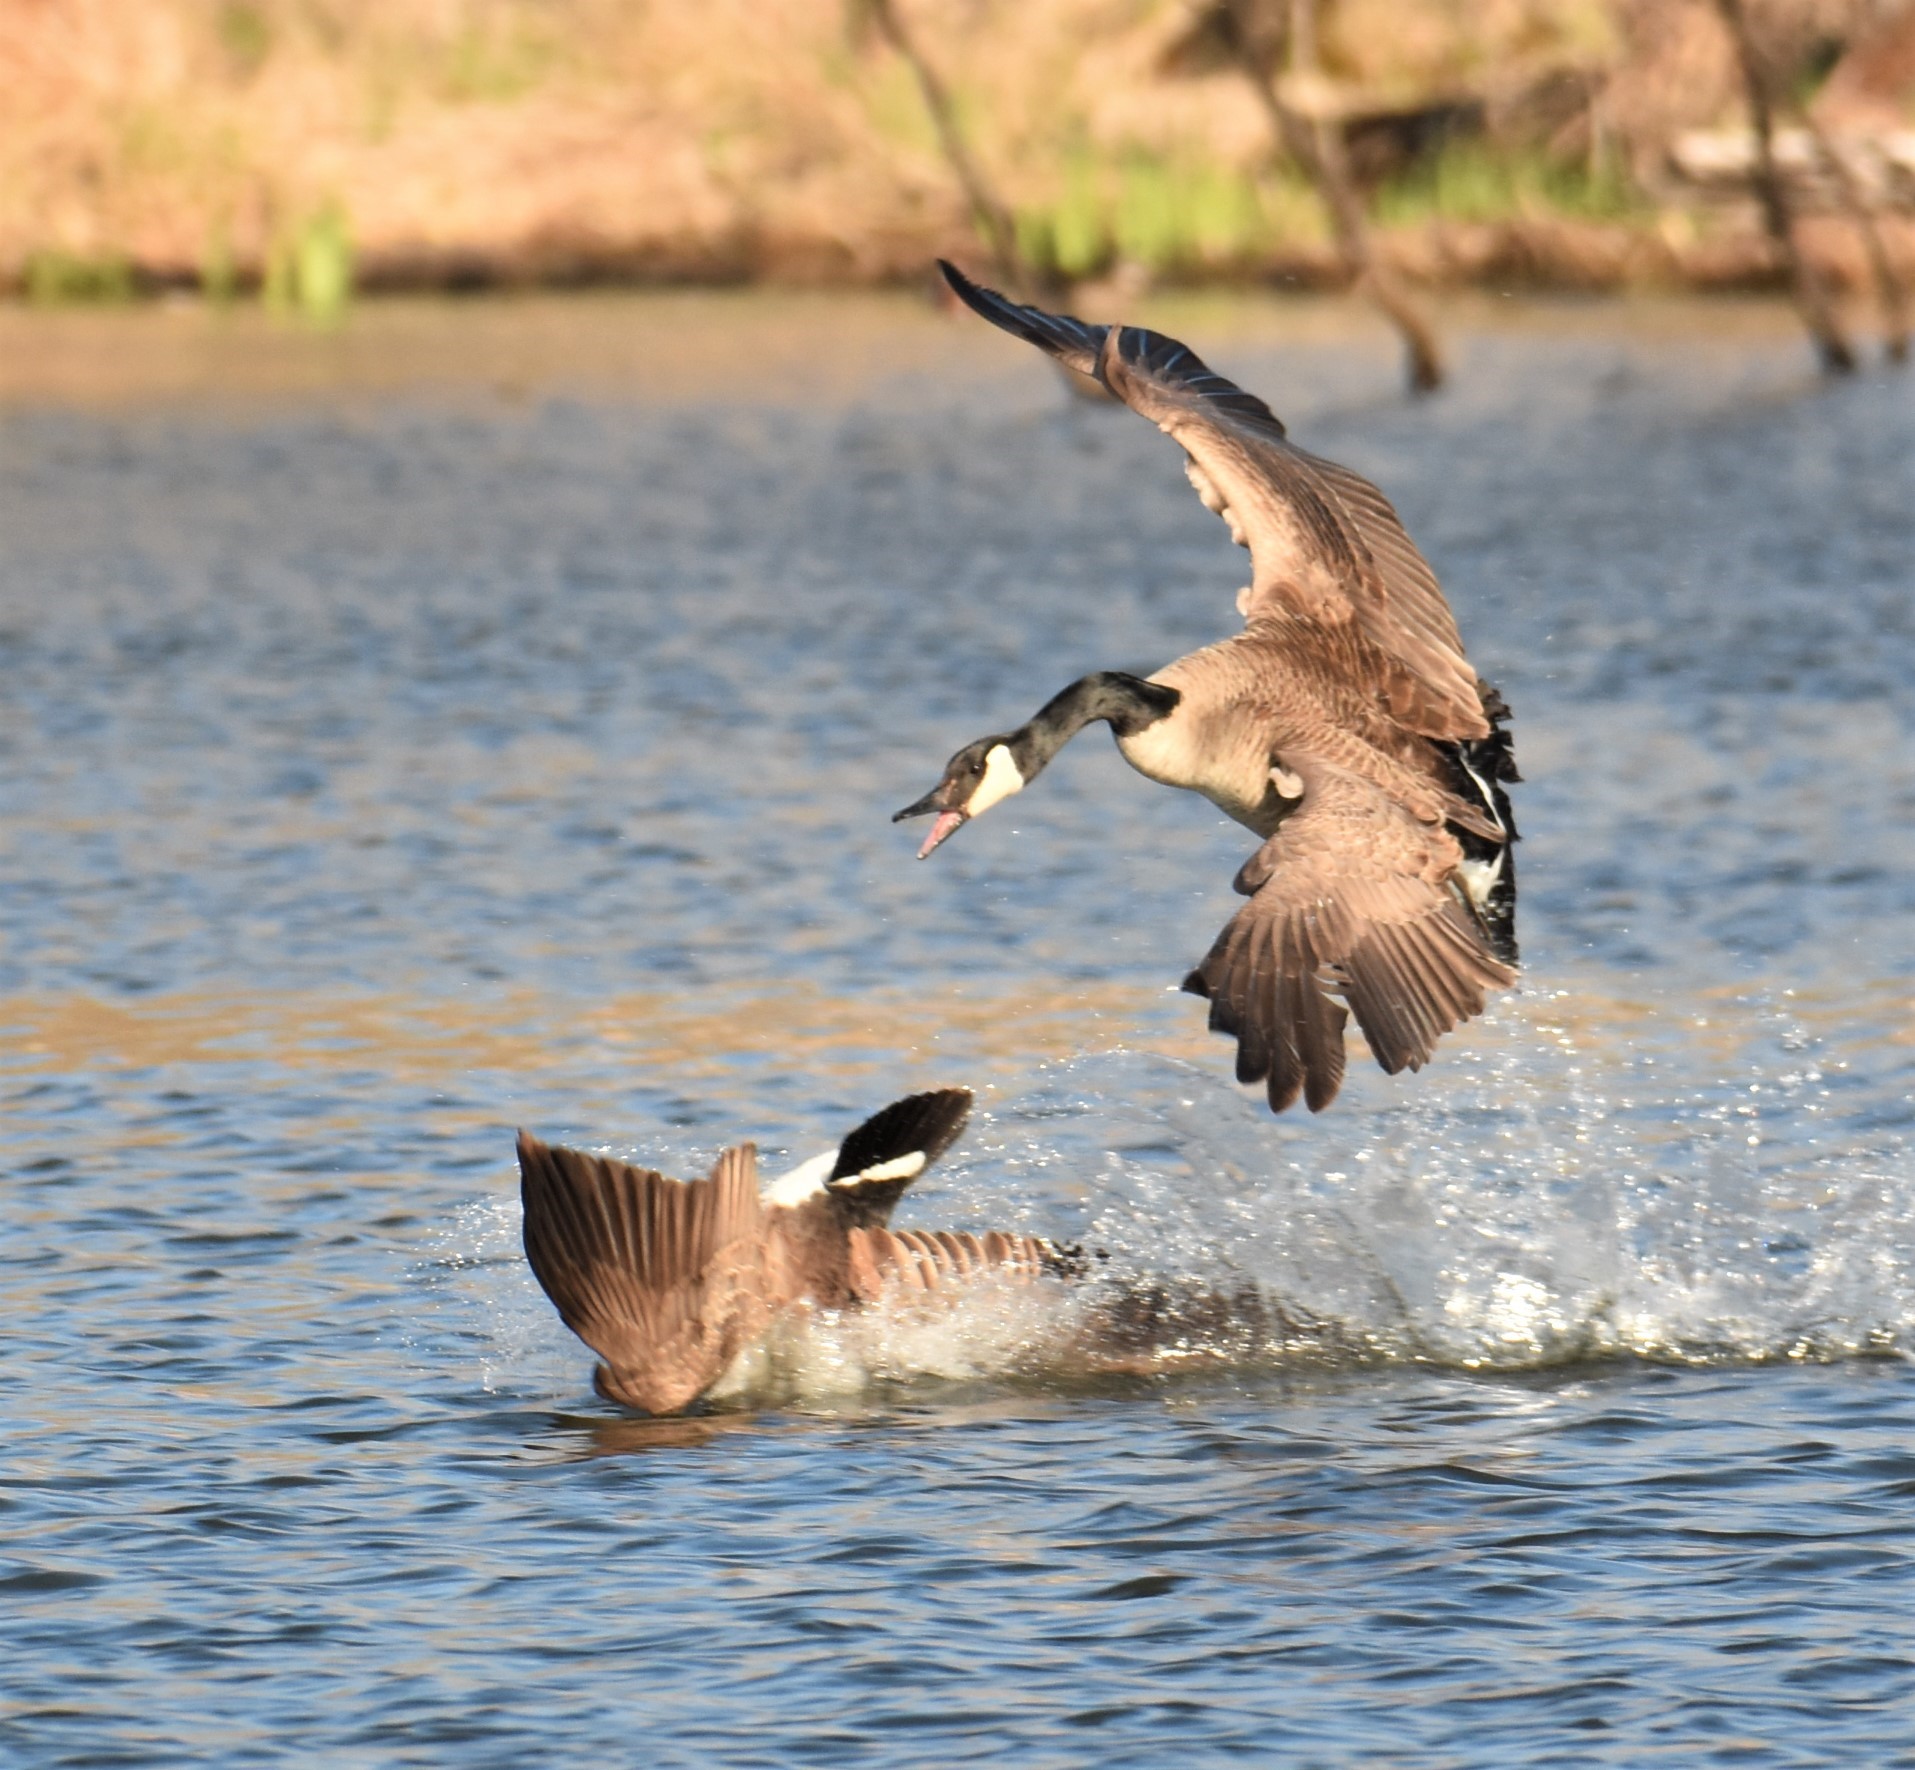
When photographing the newly hatched goslings yesterday, I noticed a lot of aggressive behavior among the adult geese. Since mating pairs are being formed, I suspect a lot of the aggression from one goose to another is to fend off fellow suitors. To catch the sparring, there are a few behaviors to watch for. First, the goose to go on the attack will be very boisterous. It appears he is warning the unwelcome guest. Next, he will often lower his neck low and parallel to the water line, and finally, he will attack the intruder. There were about two dozen geese on the slough this morning. Once the attack starts, it usually lasts only a few seconds. The geese were too widespread to wait for an attack to start and then try and focus in on the action. A better strategy I used was to listen carefully for the warning honks from a goose. Then, I’d immediately swing the camera to that goose. If his head was low to the water, an attack was usually eminent. When the defending goose attacked the unwelcome intruder, I was positioned to capture the action using a fast shutter speed. By targeting the goose that was telegraphing the warning signs, I was able to get several action shots of an attack in progress. It was also interesting to note the attacker always had his bill open. I noticed that feathers flew after a few of these attacks. I suspect more than a little bite was used.
Tip #16. The Benefits of binoculars
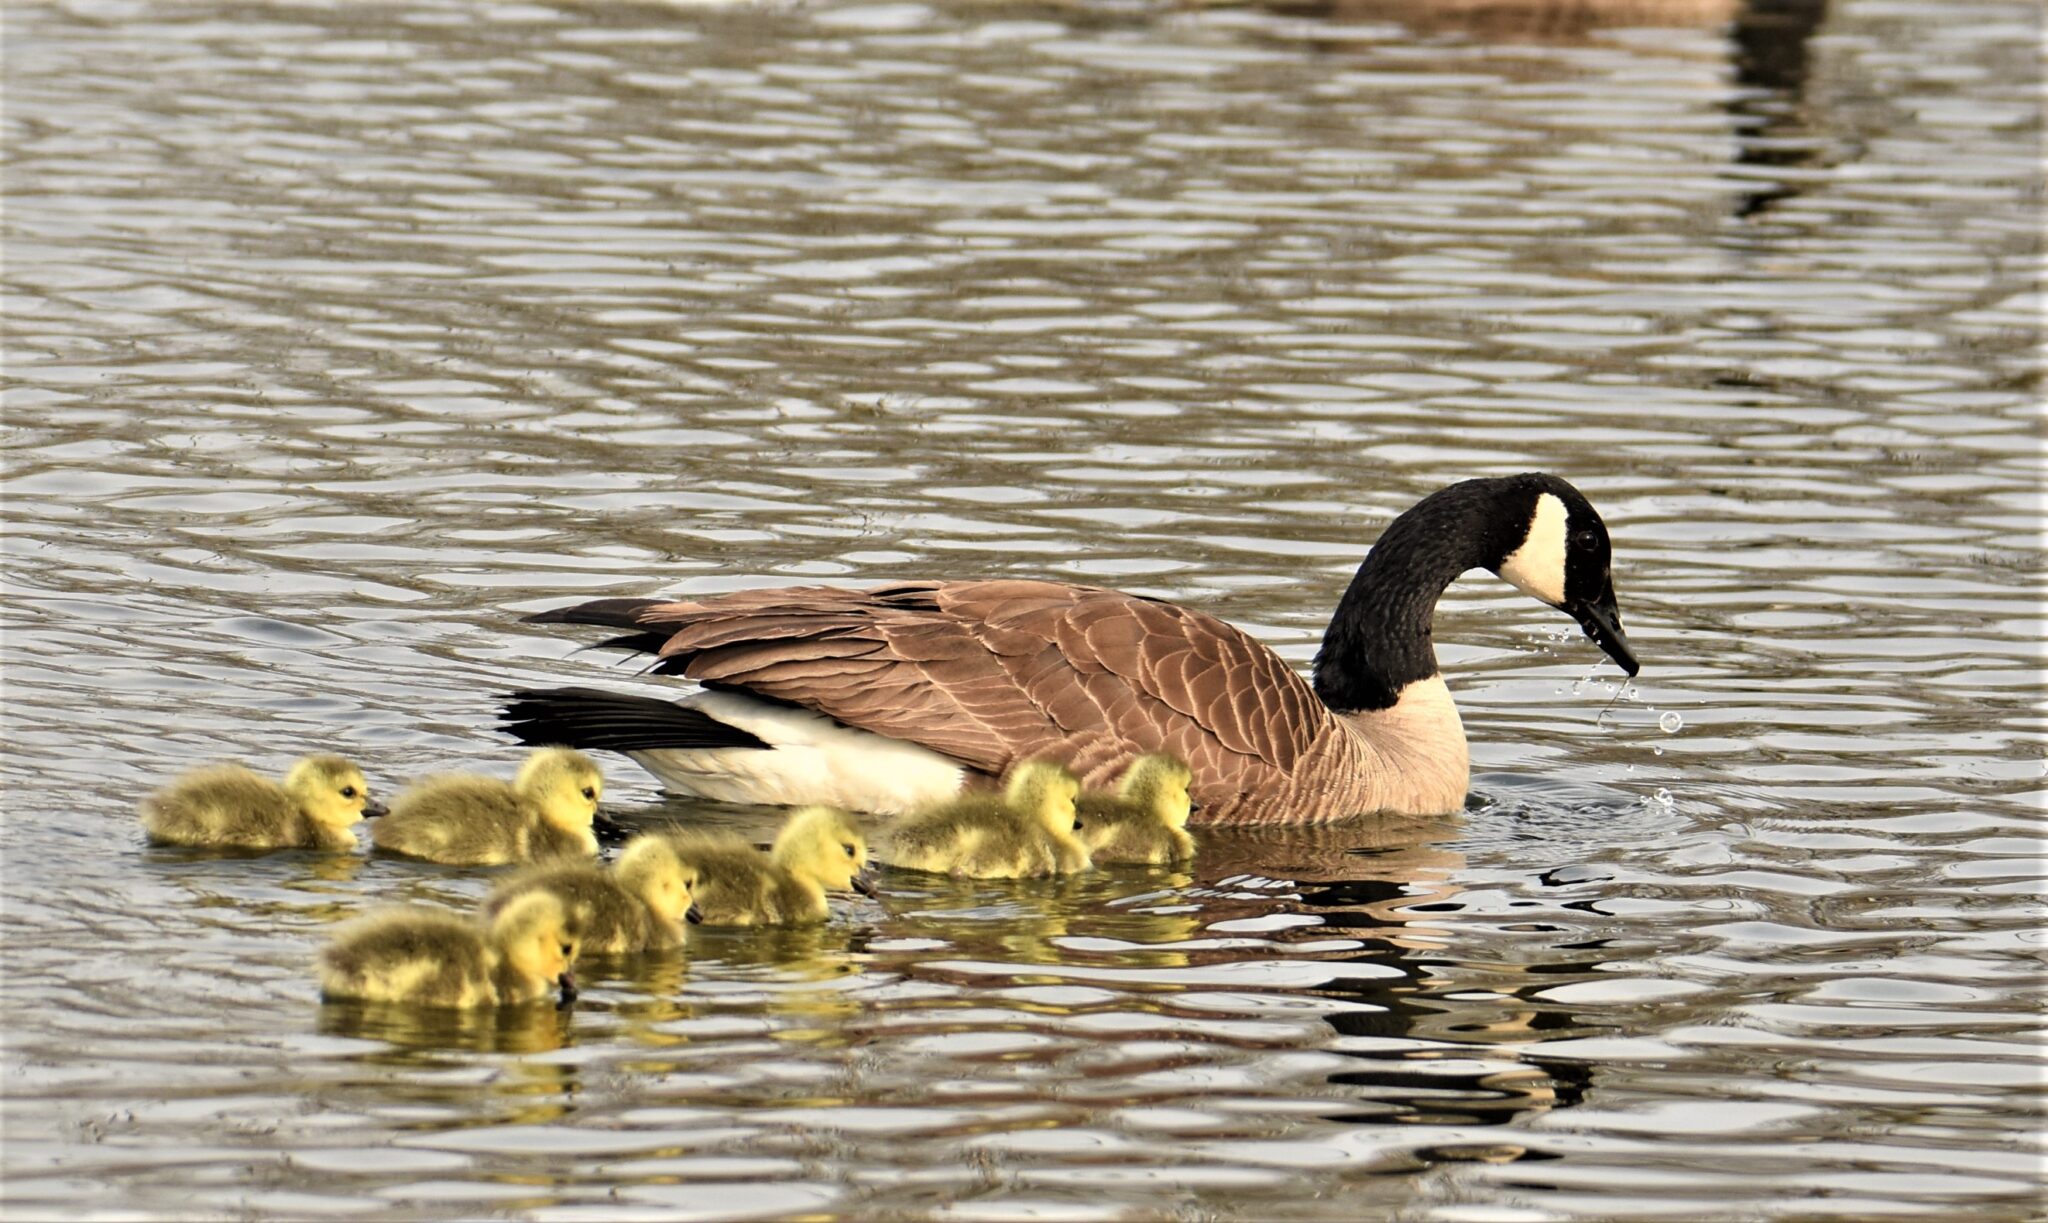
In addition to my camera equipment and camo clothing and netting, I also carry a good pair of binoculars with me in the car. When I get to an area with lots to look at, I’ll do the initial scan with the binoculars to scope it out. On this particular morning I arrived at one of my favorite sloughs and gave the opposite shoreline and muskrat houses a quick scan. When glassing over one of the muskrat houses, I glimpsed a bit of yellow that was definitely out of place. Further viewing proved it to be an early hatch of Canada Geese. I am guessing that the seven goslings were less than 24 hours old. Once located with the binoculars, I switched over to the camera fitted with a zoom lens. An extremely interesting behavior was that almost all of the geese in the slough seemed mesmerized by the goslings. Wherever mom and pop goose took the goslings, they always had a dozen adult geese in tow.
Tip #15. Shooting reflections
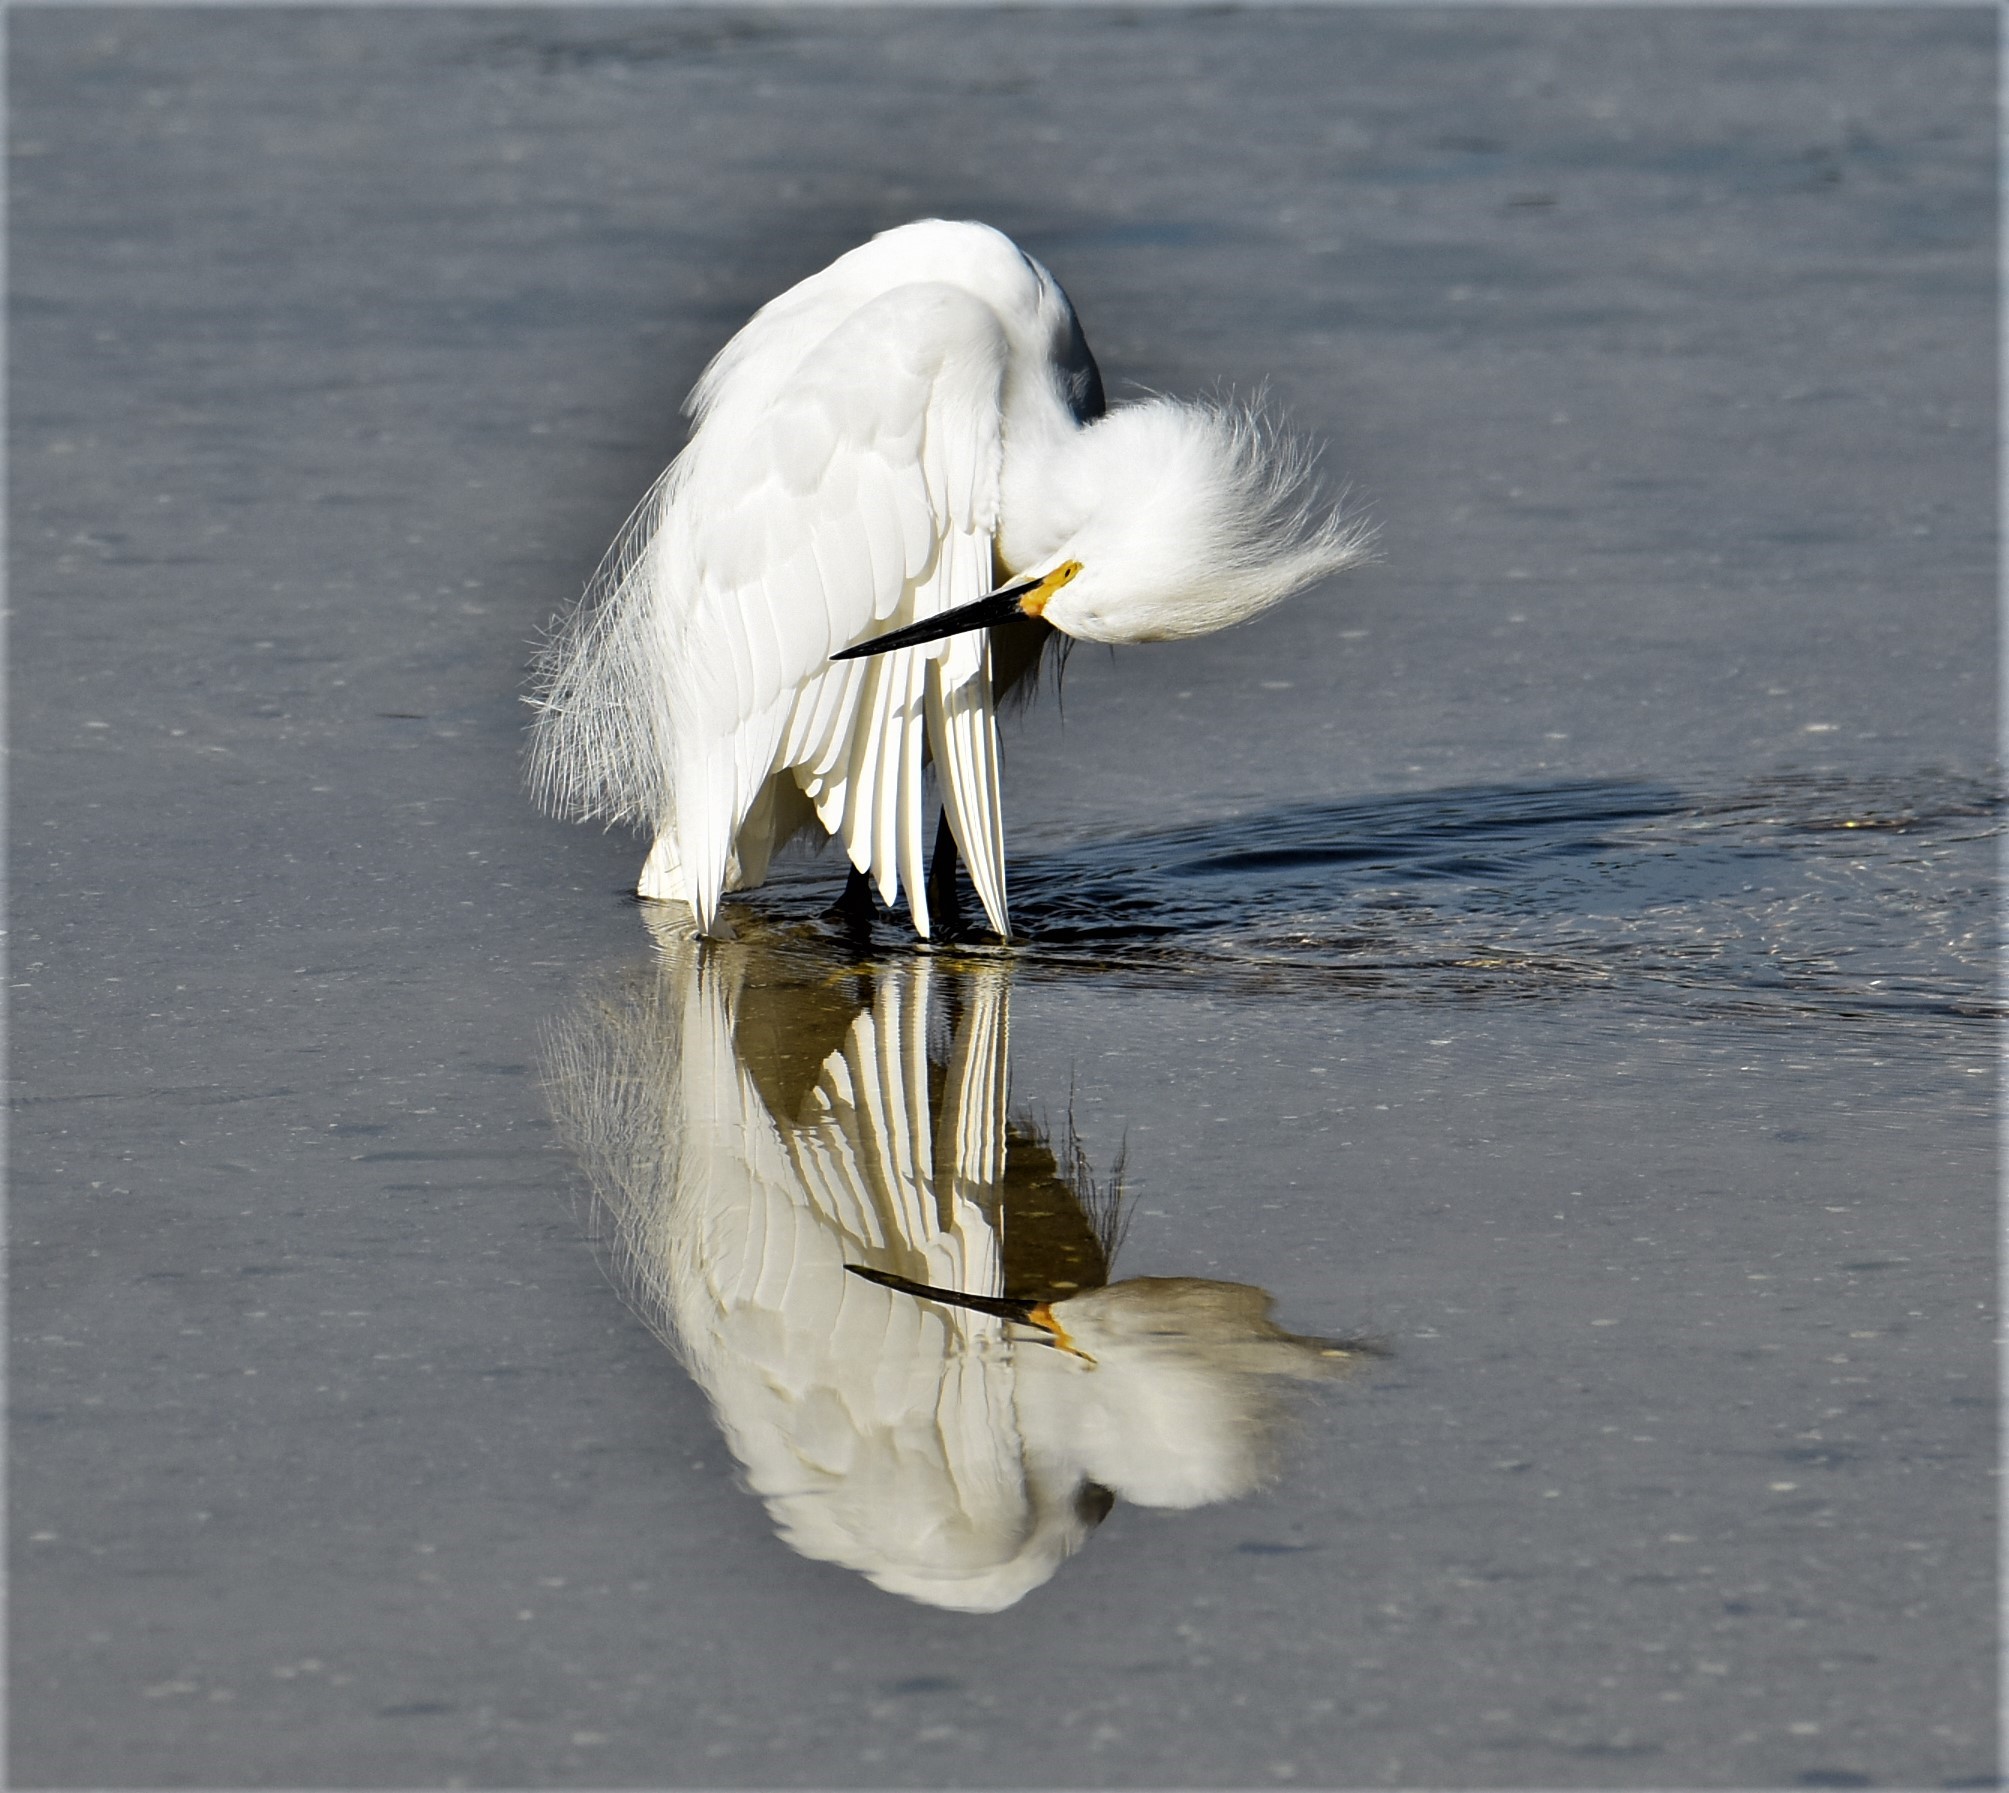
When photographing wildlife on water, you’ll often have the opportunity to take reflection shots (think about that for a second…). To get this image I arrived at the San Carlos Bay–Bunchee Beach Preserve at Fort Meyers, Florida early morning to avoid a sun too high in the sky which could have caused glare. I was fortunate in that not only did I get a nice reflection of the preening egret, but also ripples in the water caused by the tide moving at the egret’s feet. Another key to great reflection shots is avoiding the wind. Ideally, you want the wind to be as low as possible. Keep in mind that winds on a large open body of water will kick up more water disturbance than those in a sheltered area. For example, I’ve got great reflection shots at the edge of a slough next to cattails, yet less than 20 feet from the still sheltered water the wind was creating ripples in the open water.
Tip #14. Move slowly and quietly
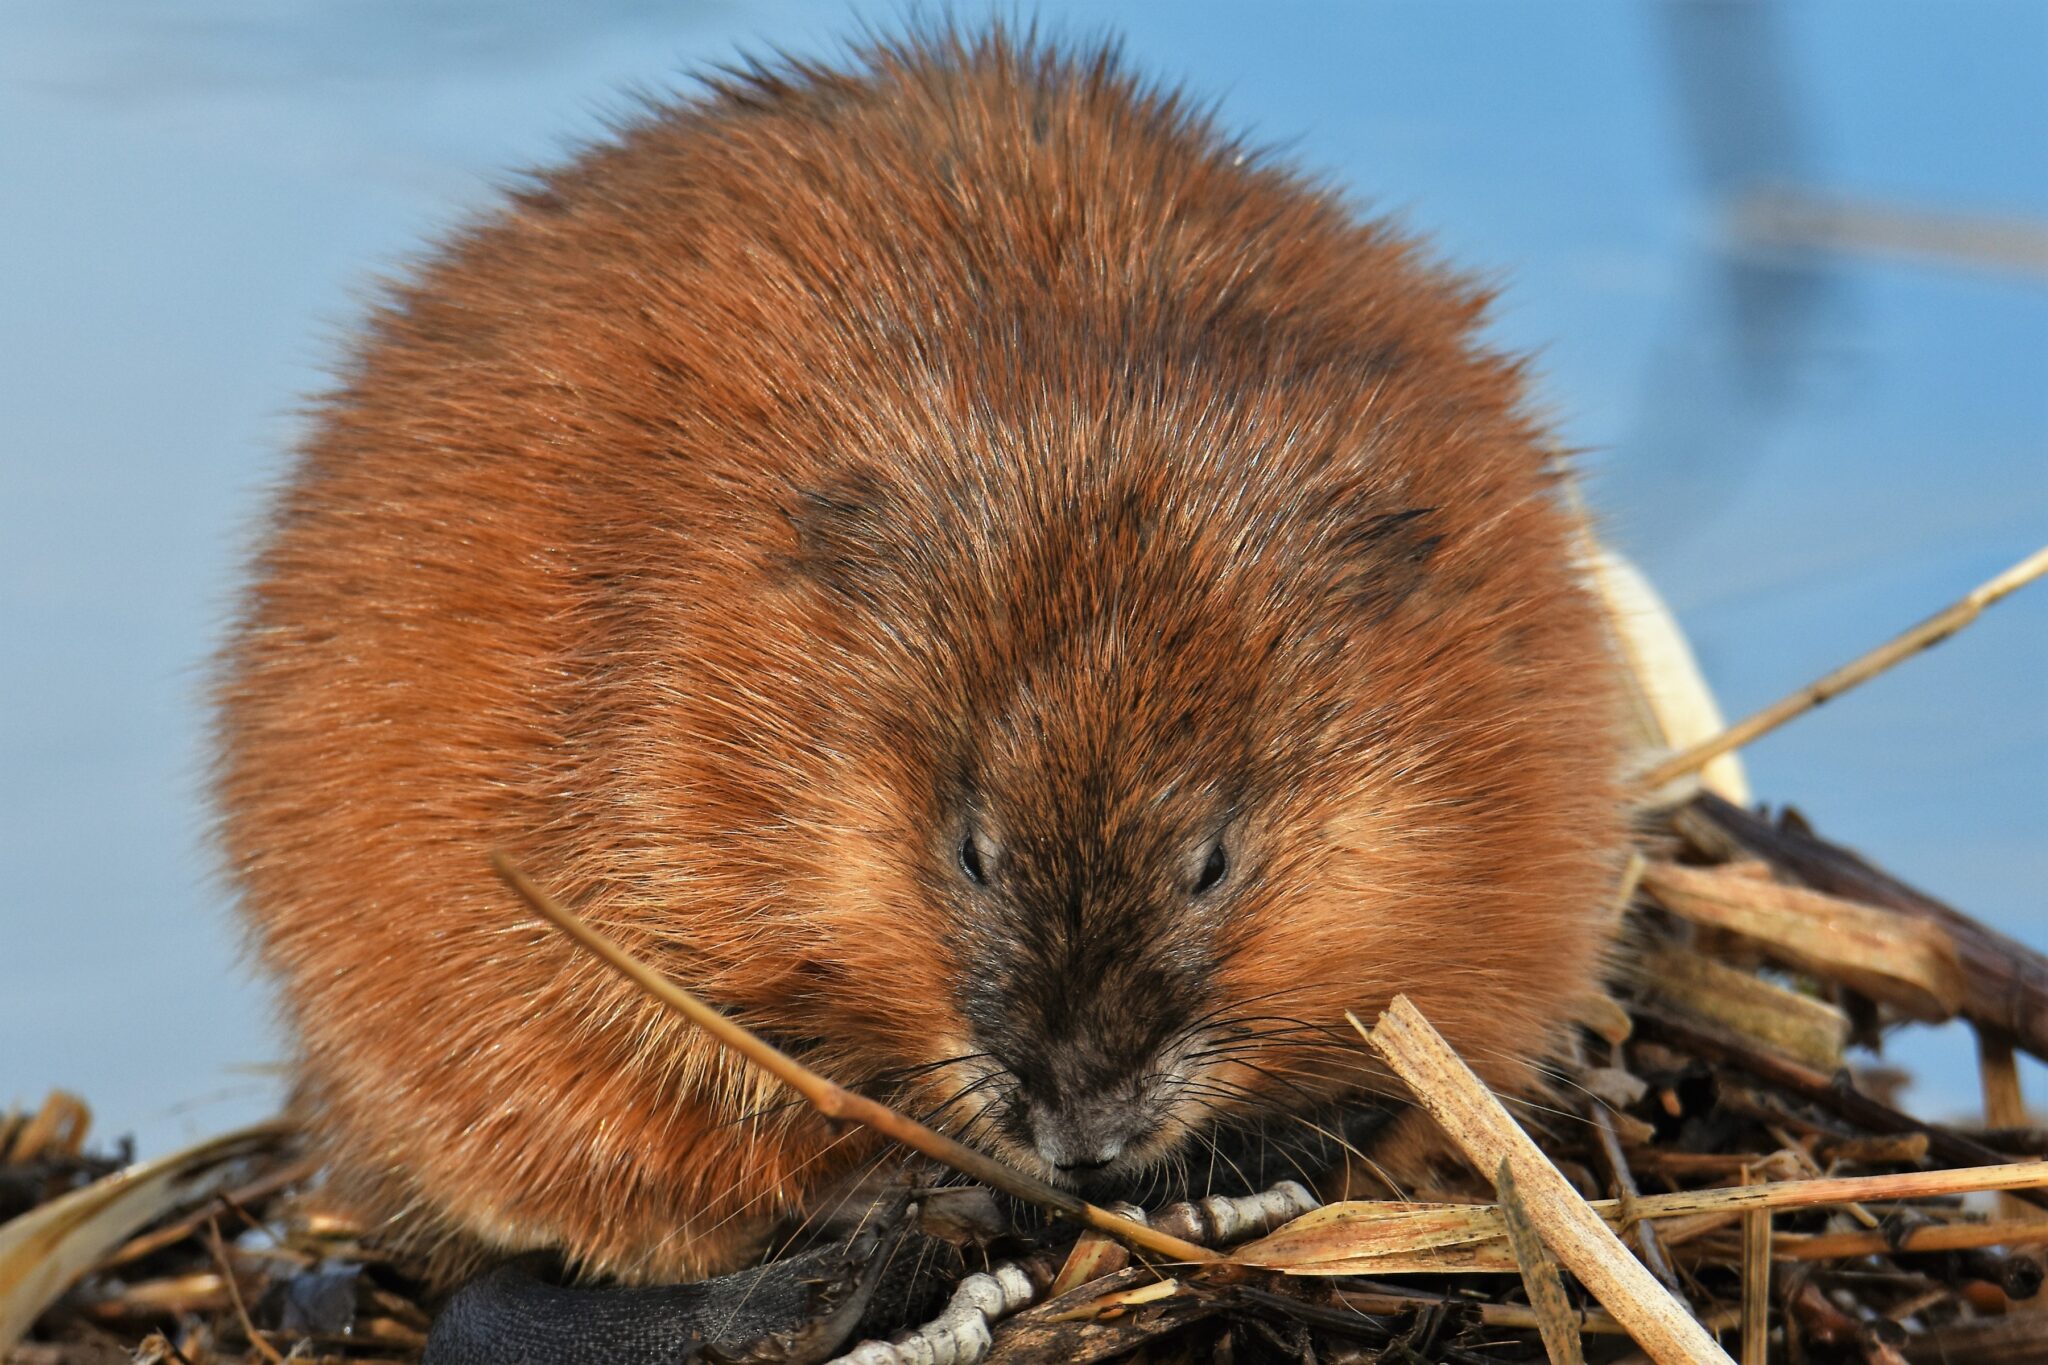
In my experience, the two things that disturb wildlife the most are motion and sound. A phrase I’ve coined is “the circle of disturbance”. As you move through any wildlife habitat, the sound you create and your motion alerts animals to your presence. The faster you move and the more noise you make the larger the diameter of the disturbance. Once you stop and stay very quiet, the diameter of the circle of disturbance slowly shrinks. Keep in mind animals survive by avoiding predators who exhibit these characteristics. The quieter you are and the slower you move, the less likely you are to disturb wildlife. I was fortunate to be alone in a park as I very slowly and quietly made my way around the trail when I came across this sleeping muskrat. The situation allowed me to get dozens of good images all within 15 feet. When a goose landed nearby, the muskrat was startled and slid into the water. Within a few minutes he climbed back on the mini-island and continued his nap and grooming. This entire time I was dead still and made no noise other than my breathing and the click of my camera.